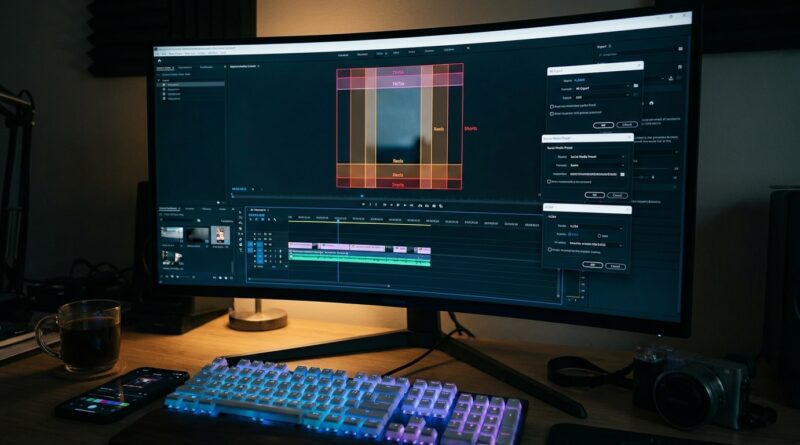
The ‘One-Capture, All-Platforms’ Hack: Export Perfect Reels, TikToks And Shorts From A Single Edit
You make one good vertical video, then the nonsense starts. TikTok crops the top line of your caption. Reels shoves your hook under interface buttons. Shorts looks fine until your product demo sits too low and gets half-covered on some phones. So you export again. Then again. Suddenly a 40-second clip has turned into 30 minutes of babysitting. It is annoying, and worse, it makes posting feel harder than making the video in the first place.
The fix is not three separate edits. It is one master vertical timeline, one “safe zone” layout, and a few export presets you save once and reuse forever. If you set up your captions, subject framing and top-and-bottom margins properly, you can export one clean file that works across TikTok, Instagram Reels, YouTube Shorts and even Pinterest with little or no last-minute repair work. This is the simple workflow I recommend if you want to learn how to export one vertical edit for tiktok reels and shorts without losing your mind.
⚡ In a Hurry? Key Takeaways
- Use one 1080×1920 master timeline and keep all key visuals inside a central safe zone so one export can work on TikTok, Reels and Shorts.
- Place hooks higher than your captions, keep captions above the bottom UI area, and save platform-ready export presets once.
- Always test your finished video on your phone before posting. App overlays change how “perfect” framing looks in real life.
The simple idea behind the hack
All the big short-form platforms like the same basic canvas. Vertical 9:16. Usually 1080 by 1920. That is the good news.
The bad news is that each app lays interface junk on top of your video in slightly different places. Buttons, usernames, captions, reply bars, product tags. None of that shows up in your editing timeline unless you plan for it.
So the trick is simple. Do not edit to the full frame. Edit to the safe frame inside the frame.
Your new rule
Anything important must sit in the middle “safe” area. That means:
- Your opening hook text
- Your face or subject
- Your product or screen demo
- Your burned-in captions
If it absolutely must be seen, do not let it drift too close to the top edge or bottom edge.
The one-project workflow that actually works
1. Create one master timeline
Set your sequence to 1080×1920, vertical 9:16. Use that as the only real edit. Do your cuts, music, B-roll, zooms and captions there.
If you are still rebuilding the same talking-head edit over and over, it is worth reading The ‘One‑Timeline AI Stack’ Hack: Edit Talking‑Head Reels In One Pass Without Ever Re‑Doing A Cut. It pairs nicely with this export method because the whole point is to stop repeating yourself.
2. Build in safe zones from the start
This is the part most people skip. Then they wonder why every app “randomly” looks different.
A good starting point for safe placement is:
- Top 250 to 300 pixels. Avoid for main hook text if possible.
- Bottom 300 to 420 pixels. Avoid for captions, calls to action and product details.
- Center band. Put your subject’s eyes, product and key text here.
You do not need to be mathematically perfect. You need to be consistently cautious.
3. Separate your visual layers mentally
Think of your vertical video in three layers.
- Hero layer: face, product, demo, action
- Text layer: hook, subtitles, labels
- Decoration layer: emojis, arrows, backgrounds, animated stickers
The hero layer gets first priority. If the choice is between a huge fancy caption and keeping your product in frame, the product wins.
4. Burn in captions carefully
Auto-captions are useful. Their default placement often is not.
Move captions up a bit from the bottom. Keep them to two lines where possible. Use a clean font with strong contrast. If your editing app lets you set a caption safe area, use it.
This is where many creators sabotage their own exports. The captions look great in the editor, then a platform’s buttons sit right on top of them.
5. Export one master file first
Before making any platform-specific versions, export a clean master:
- 1080×1920
- H.264 MP4
- High bitrate, usually 10 to 20 Mbps is plenty for short-form
- Frame rate matched to source, usually 30fps or 60fps
- AAC audio
This master file is your “works everywhere” source. Keep it archived. If one platform mangles your upload, you are not reopening the whole edit from scratch.
How to export one vertical edit for tiktok reels and shorts without breaking the framing
For TikTok
TikTok is often the fussiest because its on-screen UI can feel crowded. Keep key captions a little higher than you think you need to. Avoid tiny text in the lower third.
Best practice:
- Keep opening hook in the upper-middle area, not flush to the top
- Keep subtitles above the bottom button cluster
- Do a phone preview before posting
For Instagram Reels
Reels also loves to place interface elements where your design ideas wanted to live. Covers matter more here too, because your Reel may show in profile grid crops and feed previews.
Best practice:
- Keep main subject centered
- Make sure no key text sits at the extreme edges
- Create a frame that still looks good if the preview crops a little tighter
For YouTube Shorts
Shorts is usually more forgiving, but not enough that you should get sloppy. A title card that barely fits on TikTok might still look awkward here.
Best practice:
- Use the same 9:16 master
- Keep text spacing generous
- Check that your first second still lands even without relying on app-side text overlays
For Pinterest Idea Pins or similar vertical posts
Pinterest and smaller vertical platforms can be surprisingly easy if your main file is clean. If your layout respects safe zones, you often will not need to change much at all.
The easiest repeatable setup inside your editor
No matter what app you use, CapCut, Premiere Pro, Final Cut, DaVinci Resolve, the process is similar.
Make these presets once
- Master vertical sequence preset: 1080×1920, your preferred frame rate
- Caption style preset: same font, size, color and position every time
- Export preset: H.264 MP4, matched frame rate, saved quality settings
- Guide overlay: a PNG or adjustment layer with your safe zone markings
That guide overlay is the secret weapon. Drop it on top while editing. Turn it off before export. Now you are not guessing where “too low” or “too high” is.
Common mistakes that create export hell
Designing to the full frame
Just because you can place text in the corners does not mean you should.
Using giant captions
Big captions look dramatic until they cover your face, product, or app UI space.
Making separate edits too early
If you branch into TikTok version, Reels version and Shorts version before finishing a master, you triple your own workload.
Trusting AI reframing too much
AI tools are good at finding a face. They are not always good at understanding what actually matters in the shot. If you are showing a product, a hand movement, or text on screen, check it manually.
A practical posting routine that saves time every week
Here is the workflow I would use if I were posting daily.
- Edit one master vertical video.
- Keep all key content inside your safe zones.
- Export one high-quality MP4 master.
- AirDrop or send it to your phone.
- Preview it in TikTok, Reels and Shorts before publishing.
- Only if one platform looks off, make a tiny duplicate adjustment. Not a full re-edit.
That last step matters. You are aiming for one clean source and maybe tiny tweaks, not three separate production jobs.
When you should break the “one export” rule
There are a few exceptions.
- If a sponsor requires platform-specific text placement
- If one app needs a different duration cut
- If your cover image needs custom treatment for Instagram profile grid
- If your captions are platform-native instead of burned in
That is still fine. You are not failing the system. You are using the master as the base and customizing only where there is a real reason.
At a Glance: Comparison
| Feature/Aspect | Details | Verdict |
|---|---|---|
| Master timeline | One 1080×1920 project used as the source for TikTok, Reels, Shorts and Pinterest | Best starting point for speed and consistency |
| Safe zone layout | Keep hooks, captions and products away from the top and bottom UI-heavy areas | Essential if you want one export to survive every platform |
| Platform-specific tweaks | Minor only, usually cover art or tiny text shifts after phone preview | Useful as a backup, but should not become a full second edit |
Conclusion
You do not need to keep exporting three slightly different versions of the same clip and hoping one survives the upload. A better system is one clean master project, one sensible safe-zone layout, and one saved export preset you can trust. That is the real win here. Right now creators are juggling more platforms than ever, and the latest crop of AI tools is great at auto-captions and templates but terrible at respecting each app’s weird little framing rules. A practical, repeatable export workflow that lets you keep one clean project file and still ship native-feeling videos to TikTok, Reels, Shorts and even Pinterest saves hours every week, reduces burnout and makes it much easier to say yes to posting daily instead of stalling in export hell.