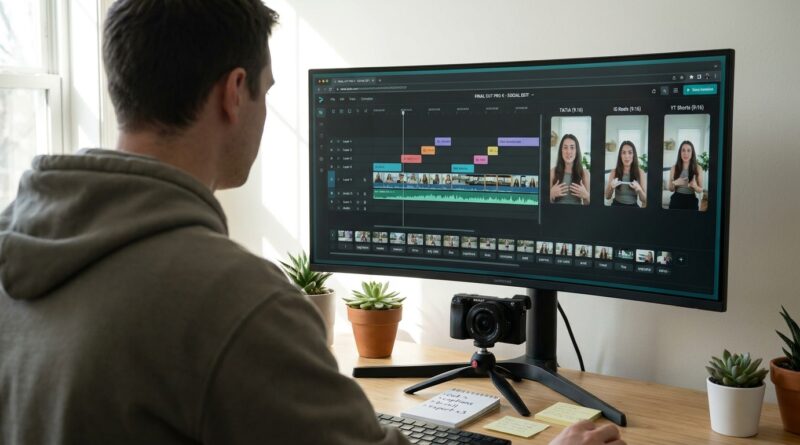
The ‘One‑Timeline AI Stack’ Hack: Edit Talking‑Head Reels In One Pass Without Ever Re‑Doing A Cut
You know the feeling. You finally have a decent talking-head clip ready to turn into a Reel, and somehow the actual editing becomes a part-time job. First you cut pauses in one app. Then you move the file somewhere else for captions. Then you jump again for B roll, reframing, or cleanup. By the time you export, rename files, and make platform versions, your brain is cooked. Posting starts to feel harder than filming.
That is why the smartest ai video editing workflow for reels and tiktok right now is not about finding one perfect tool. It is about building one timeline that does the heavy lifting once, then handing off only the final polish. If you are a solo creator, this is the hack that makes daily posting realistic. One import. One cut pass. Captions, B roll, and platform versions covered without re-doing your edit from scratch every single time.
⚡ In a Hurry? Key Takeaways
- The best workflow is a two- or three-app chain where your main timeline is edited once, then reused for captions, B roll, and exports.
- Start with one all-in-one editor for cuts and transcript editing, then use a second tool only for what it does better, like styling captions or auto-resizing.
- Do not keep exporting and re-importing rough cuts. Lock your edit first, then create platform variants from that approved master timeline.
The real problem is not editing, it is context switching
Most creators do not lose time because trimming clips is hard. They lose time because every app wants to be the center of your process.
One tool is great at removing filler words. Another makes pretty captions. Another helps with social sizing. Another gives you stock B roll. On paper, that sounds useful. In real life, it means you keep stopping, exporting, waiting, checking, and fixing tiny things that break in the handoff.
That is where the one-timeline idea helps. You pick one app to be the “source of truth.” That is your master timeline. Every cut decision lives there first. Then, only after the structure is done, you pass the nearly finished clip to one or two other tools for specific jobs.
What the “One-Timeline AI Stack” actually looks like
Think of it as a relay race, not a free-for-all.
Tool 1: The master timeline editor
This is where you import your raw talking-head video, trim the dead air, cut mistakes, and shape the story. Good picks here are the newer AI editors that let you edit by transcript, detect silences, and create social-friendly sequences fast.
Your job in this first stage is simple. Build the final structure once. Hook. Main point. Proof. Call to action. If the spoken flow changes, it happens here and nowhere else.
Tool 2: The polish layer
Once the cuts are locked, move the almost-finished video into a tool that is better at captions, motion graphics, stock inserts, eye contact fixes, or auto-reframing. This tool should not change the story. It should only make the story easier to watch.
If you start rewriting the edit here, the whole system falls apart.
Tool 3: The distribution layer, optional
Some creators like a final step for resizing, safe-zone checks, thumbnail frames, or exporting multiple versions for TikTok, Reels, and Shorts. That is fine, as long as this step does not send you back into recutting your video.
That is the rule. One pass for cuts. Everything after that is packaging.
A ready-to-steal workflow template
Here is the practical version.
Step 1: Import once and make a “master vertical” project
Drop your raw clip into your main editor. Use a 9:16 timeline from the start. That removes one future headache. If you record in 4K horizontal, keep enough room to crop, but still edit with the vertical end result in mind.
Name this project clearly. Something like “June-Advice-Reel-Master.” Make this the only timeline where structural edits happen.
Step 2: Cut by transcript, not by waveform
If your editor supports transcript editing, use it. It is much faster for talking-head content. Delete repeated lines, “ums,” long pauses, throat clears, and the part where you stare at the lens before speaking.
Then watch it once in real time. Only once. That is your scrub pass. You are checking pacing, not obsessing over every frame.
Step 3: Add markers for B roll while you edit
This is the sneaky time-saver. Do not stop your cut session to hunt for visuals. Just drop markers that say things like “screen recording here,” “close-up of product,” or “text bullet.”
That way, your brain stays in story mode. You are not breaking focus every two minutes.
Step 4: Create your subtitle-safe composition
Before export, set your title-safe habits. Keep face framing high enough for captions. Leave room at the bottom for text. If you want more visual energy in static shots, this is also the point to use light motion tricks. If your talking-head clips feel flat, a technique like The ‘Micro-Motion Zoom’ Hack: Steal That “Shot On iPhone” Look For Your Reels Without Buying A New Phone can make simple footage feel much less lifeless without forcing a reshoot.
Step 5: Export a clean master, then polish once
Now export one high-quality master file. This is the version you send to your caption and polish tool. Add animated captions, visual callouts, stock overlays, and B roll from your earlier markers.
Do not trim new sections unless there is a true mistake. If the story needs changing, go back to the master timeline and fix it there.
Step 6: Make platform versions from the polished file
Now create your TikTok, Reels, and Shorts versions. Usually, these differences are small. Maybe one gets a stronger opening text card. Maybe another avoids certain music. Maybe one keeps slightly larger captions for readability.
The key is that they are children of the same master, not three separate editing projects.
Why this works better than the “all-in-one app” dream
Every few months, a new app promises to do everything. Sometimes it is close. Usually it is not.
One tool might be great at transcript cuts but mediocre at caption design. Another might have beautiful subtitles but weak timeline control. Trying to force one app to do it all can be just as slow as using too many apps.
The better answer is a small stack with clear jobs.
- App one decides the story.
- App two improves the presentation.
- App three, if you need it, prepares distribution.
That is manageable. It is also repeatable, which matters more than novelty when you need to post often.
How to choose your stack without getting lost
You do not need to test twenty tools. Use three questions.
1. Which app helps me cut fastest?
This becomes your master timeline editor. Speed matters more than fancy templates here.
2. Which app noticeably improves the finished look?
This is your polish layer. Maybe it gives cleaner captions. Maybe it makes reframing smarter. Maybe its stock B roll search is actually useful.
3. Can these tools hand off files without drama?
If every export breaks audio sync, changes framing, or softens the image, the workflow is not worth it. Smooth handoffs are more important than feature lists.
Common mistakes that quietly waste hours
Recutting after captions
This is the classic trap. You add captions, then decide a sentence should go. Now your subtitle timing shifts, B roll timing shifts, and maybe your highlights shift too. Lock cuts before polish.
Using different aspect ratios too late
If your master edit is not built with vertical framing in mind, you will spend extra time fixing chopped foreheads and awkward crops.
Adding B roll too early
B roll feels productive, but it can distract you from fixing the actual script flow. Story first. Coverage second.
Making each platform version by hand
You do not need three separate timelines for small differences. Start from the same polished master and make light tweaks only when needed.
What solo creators should do this week
If your current process feels messy, do not rebuild everything at once. Just fix the biggest leak.
Pick one app to be your cut-first timeline. Then pick one more app for polish. That is enough to start.
Run your next talking-head clip through this order:
- Import raw footage once.
- Cut the full story in one transcript-based pass.
- Drop markers instead of pausing to search for extras.
- Export one master.
- Add captions, B roll, and styling in one polish session.
- Export platform variants from that final version.
Do this for a week and you will feel the difference fast. Not because the tools are magical. Because your brain is no longer reopening the same decisions over and over.
At a Glance: Comparison
| Feature/Aspect | Details | Verdict |
|---|---|---|
| Master timeline editing | Use one editor for transcript cuts, pacing, and story structure. This is where all major decisions happen. | Essential. Do not split this step across apps. |
| Polish and captions | A second tool can handle better subtitles, B roll overlays, motion text, and reframing after the edit is locked. | Worth it if it saves time and does not tempt you to recut. |
| Multi-platform exports | Create TikTok, Reels, and Shorts versions from the same polished master with small platform-specific tweaks. | Best practice for daily posting and consistency. |
Conclusion
Creators are drowning in AI tools, but still losing hours to app switching, exports, and repeated decisions. That is the part nobody brags about. The edge now is not another shiny button. It is a calmer system. Use two or three modern editors in a clear order, keep one master timeline, and only scrub your footage once. That is what makes an ai video editing workflow for reels and tiktok actually sustainable. One import. One pass. Three platforms covered. For solo creators trying to post consistently, that is not just efficient. It is the difference between planning content and actually publishing it.