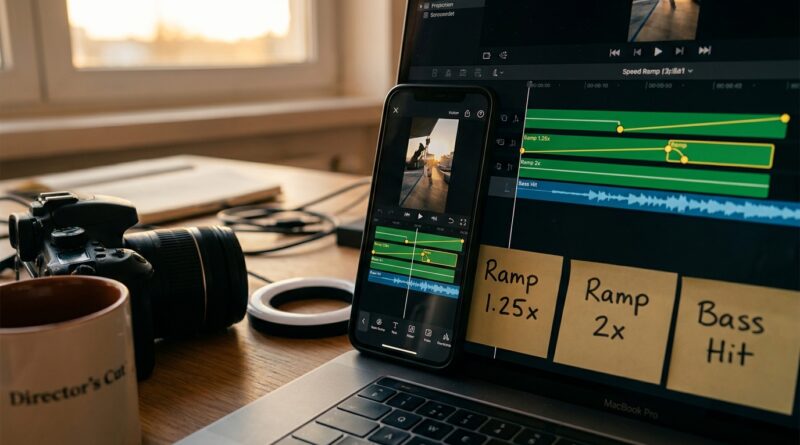
The ‘Speed-Ramp Safe Pack’ Hack: Batch Velocity Edits For TikTok & Reels Without Breaking Your Footage
You try one of those slick TikTok speed ramps, and somehow your footage ends up looking like it fell down the stairs. The motion stutters. The beat misses. The audio slides out of place. Then a 15-second Reel turns into a two-hour editing session. Frustrating, especially when the finished effect is supposed to feel effortless. The good news is you do not need to keyframe every clip from scratch, and you do not need to depend on some trendy template that vanishes next month. A simple “speed-ramp safe pack” can give you smooth, repeatable velocity edits you can drop onto product shots, vlogs, B-roll, and UGC without wrecking your footage. Think of it as building your own mini preset system. Once you set it up once, you can keep reusing it in CapCut, Premiere Pro, Final Cut, DaVinci Resolve, or whatever app you move to next.
⚡ In a Hurry? Key Takeaways
- Smooth velocity speed ramps for TikTok and Reels work best when you reuse a small set of tested speed patterns instead of inventing a new ramp for every clip.
- Start with 3 safe presets, fast-in/slow-out, slow-fast-slow, and punch zoom ramp, then save them as templates or adjustment layers in your editor.
- To avoid jitter and drift, shoot at higher frame rates, keep ramps short, and separate or mute original audio before heavy speed changes.
Why most speed ramps look bad
The problem usually is not the idea. It is the footage and the timing.
Most creators try to force a dramatic speed change onto a normal 30fps clip, then wonder why the motion gets crunchy. Or they drag random speed points around until it “sort of” matches the music. That is where the chaos starts.
If you want to learn how to do smooth velocity speed ramps for TikTok and Reels, the trick is simple. Stop treating every clip like a custom art project. Build a repeatable pack of safe ramp moves that already look good.
What a “Speed-Ramp Safe Pack” actually is
It is not a fancy plugin. It is just a small batch of speed ramp presets you trust.
Your pack should include:
- 3 to 5 speed ramp patterns
- Matching transition lengths
- Audio rules for when to keep, mute, or replace sound
- Export settings that do not introduce extra stutter
Once built, you can apply these ramps over and over with tiny changes instead of starting from zero every time.
The 3 safest speed ramps to build first
1. Fast-in, slow-out
This is the easiest one to use on product reveals, outfit shots, travel clips, and quick camera moves.
Try this rough pattern:
- Start at 100%
- Jump to 250% to 400% for a very short burst
- Ease down to 100% or 70%
The burst creates energy. The slowdown gives the viewer a clean moment to actually see the subject.
2. Slow-fast-slow
This is the classic “expensive” social edit. It works well when a person turns, a hand places a product, or the camera passes an object.
- Start at 70% to 100%
- Ramp quickly to 300%
- Return to 70% to 100%
Use this when you want the middle of the movement to hit the beat.
3. Punch ramp
This one is perfect for beat drops and transitions between scenes.
- Keep most of the clip at 100%
- Add a tiny burst at 500% to 800%
- Cut immediately into the next shot
This is less about elegance and more about impact. Keep it short. Really short.
The footage rule that saves everything
If possible, shoot at 60fps or higher.
This gives your editor more frames to work with when slowing things down or smoothing out changes. You can still do ramps with 30fps footage, but your margin for error gets much smaller. Big speed changes on 30fps clips often create that choppy, nervous look people mistake for “bad editing.” It is usually just not enough frame data.
If your phone supports 60fps or 120fps, use it for clips you know you want to ramp later.
How to build your batch preset system
Step 1: Pick standard durations
Choose fixed lengths for your ramps. For example:
- 0.2 seconds for the speed-up
- 0.3 seconds for the ease down
- 0.1 seconds for punch cuts
Using consistent timing is what makes your edits feel branded instead of random.
Step 2: Save the patterns inside your editing app
Different apps handle this differently, but the idea is the same.
- In CapCut, save style copies, project templates, or duplicate a clean “ramp bank” sequence.
- In Premiere Pro, save preset clips in a bin or build a sequence with labeled ramp examples.
- In Final Cut Pro, use compound clips or duplicated project sections.
- In DaVinci Resolve, keep a reusable timeline with color-coded ramp examples.
You are making a toolbox, not chasing perfection.
Step 3: Name them like a sane person
Do not save presets as “cool one” or “final_final2.”
Use names like:
- Ramp 01 Fast-In Clean
- Ramp 02 Slow-Fast-Slow Beat
- Ramp 03 Punch Cut Transition
Six months from now, you will thank yourself.
How to keep speed ramps smooth instead of jittery
Use easing, not hard corners
If your editor lets you smooth the curve, do it. Abrupt jumps can work for glitchy edits, but most TikTok and Reels velocity styles look better when the motion eases in and out.
Do not over-ramp boring footage
Speed ramps need motion to look good. A static clip of someone standing still will not suddenly become cinematic because you shoved it to 400% for half a second.
Keep the ramp attached to movement
Good moments for ramps:
- Head turns
- Camera whips
- Walking passes
- Hand reveals
- Product spins
- Before and after transitions
Bad moments for ramps:
- Talking directly to camera
- Text-heavy explainer sections
- Footage that is already shaky
The audio problem, and how to avoid it
Audio drift is one of the fastest ways to make a Reel feel cheap.
When you heavily change clip speed, the original sound often becomes useless. You will hear stretched voices, odd pops, or beats that no longer line up.
The simple fix
- Mute original clip audio during strong ramps
- Use music as your timing anchor
- Add clean sound effects, whooshes, clicks, taps, camera swipes
- Only keep original audio when the speed change is subtle
If dialogue matters, cut away from the ramp before the spoken line starts. Let the effect live in the visual, not on someone’s face while they are talking.
A quick workflow that cuts editing time in half
Here is the fast version.
- Drop all clips on your timeline.
- Mark the beat points first.
- Pick only the clips with real movement.
- Apply one of your 3 safe ramps.
- Adjust only the middle speed value if needed.
- Mute or replace messy source audio.
- Export and test on your phone before posting.
The big win is this. You are not deciding everything from scratch anymore. You are choosing from a small menu of moves that already work.
Common mistakes to stop making
Ramp on every clip
Too much speed variation gets exhausting. A few strong moments hit harder than nonstop motion tricks.
Using one giant speed spike
If the speed burst is too long, it looks silly fast instead of stylish. Shorter usually looks better.
Ignoring export frame rate
If you shot at 60fps and export badly, you can still ruin the result. Match your timeline and export settings carefully, especially if your app tries to “help” with auto frame conversion.
Letting templates decide your whole brand
Templates are fine for practice. They are not a long-term system. Your own preset pack is far more useful because it survives app updates, trend changes, and feature paywalls.
Best apps for this hack
You do not need the most expensive editor. You need one that lets you control speed points clearly.
- CapCut: Easiest for beginners. Great for quick social edits.
- Premiere Pro: Better for creators doing lots of client work or batch content.
- Final Cut Pro: Fast once you get your system set up.
- DaVinci Resolve: Excellent control, especially if you also care about color.
If you are just starting, CapCut is the least intimidating place to build your first safe pack. If you edit all day, a desktop app gives you more control and cleaner reuse.
When to use speed ramps, and when not to
Use them when you want energy, transitions, and rhythm.
Skip them when the clip needs clarity, emotion, or direct speech. Not every Reel needs to look like it drank three espressos.
The best creators mix pacing. A smooth normal clip right after a ramp often makes the ramp feel stronger.
At a Glance: Comparison
| Feature/Aspect | Details | Verdict |
|---|---|---|
| Best footage for ramps | 60fps or higher, with clear subject movement like turns, passes, reveals, or whip pans | Strongly recommended |
| Fastest editing method | Build 3 to 5 reusable ramp presets instead of keyframing every Reel from scratch | Best time-saver |
| Audio handling | Mute original audio on heavy ramps and use music plus sound effects to keep timing clean | Safest option |
Conclusion
Velocity speed ramps are still one of the most-watched editing styles on TikTok and Reels, but you do not need to be stuck borrowing someone else’s template every time a trend rolls through. If you build your own small, platform-agnostic safe pack, you get the look without the headache. That means smoother motion, cleaner audio, faster turnaround, and a style that still feels like you. Spend one afternoon setting up 3 or 4 dependable ramp patterns, and you will have a shortcut you can use on product demos, vlogs, B-roll montages, and UGC spots all week. That is the real hack. Not editing harder. Editing once, then reusing what works.