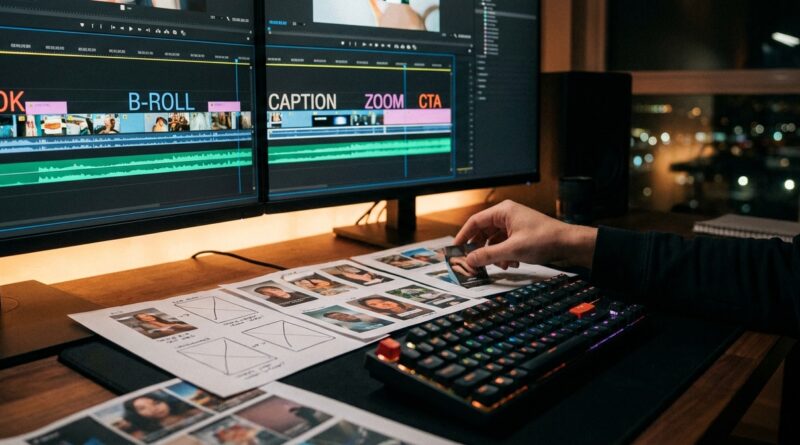
The ‘Template-To-Timeline’ Hack: Turn Viral Reel Layouts Into Reusable Editing Blueprints
You know that moment when the recording is done, the script is decent, and then your brain hits a wall because you still have to decide where every caption, cutaway, punch-in and sound effect goes? That is where half the editing session disappears. It is not the hard edit that drains you. It is the tiny decisions. Bigger creators look calm because many of them are not building each Reel from zero. They are using a repeatable video editing template workflow for TikTok Reels and Shorts, even if they never call it that. The simple fix is to turn a Reel layout you already like into a reusable timeline blueprint. One strong hook slot. One place for B-roll. One text style. One zoom rhythm. Once that skeleton exists, new clips become swaps, not rebuilds. That saves time, keeps your style consistent, and makes batch editing possible on a weeknight instead of eating your whole weekend.
⚡ In a Hurry? Key Takeaways
- A template-to-timeline system means you build one proven Reel structure once, then reuse it for future videos.
- Start by copying a past high-performing clip and labeling fixed slots for hook, captions, B-roll, zooms and CTA.
- The goal is speed and consistency, not making every post identical. Leave room to test new hooks and pacing.
What the template-to-timeline hack actually is
Think of it like a house floor plan.
You are not re-pouring the foundation every time you make dinner. The kitchen is already where the kitchen goes. Same idea here. A timeline template is a pre-built editing structure for your short-form videos.
Instead of opening a blank project and asking, “Where should text pop in?” you already know. Instead of wondering when to cut to B-roll, you already have a slot for it. Instead of guessing how often to punch in, you already have markers.
That is the hack. You study one or two Reel layouts that fit your style, then rebuild them as reusable blueprints inside your editor.
Why this matters more in 2026 than another new app
Most creators now have access to the same caption tools, the same auto-cut tools and the same script helpers. That means the edge is not just having software. It is having a system.
The creators posting three clips a day are often winning on speed of execution. They can go from script to export without quality falling apart. That is a huge advantage if you also have a job, clients, kids, or a life outside your camera roll.
A good video editing template workflow for TikTok Reels and Shorts helps you:
- batch several clips in one sitting
- keep your branding and pacing consistent
- test more hooks without rebuilding every edit
- reduce decision fatigue
- avoid burnout
How to build your first timeline blueprint
1. Pick a Reel that already worked for you
Do not start with a random viral post from someone in a totally different niche. Start with one of your own clips that held attention, got saves, or simply felt easy to watch.
If you do not have one yet, pick a creator whose pacing matches your content style. Then break the video into parts.
2. Map the structure, not the exact content
You are not trying to clone the words. You are trying to capture the layout.
For example:
- 0:00 to 0:02. Hook text on screen
- 0:02 to 0:05. Talking head with captions
- 0:05 to 0:07. B-roll insert
- 0:07 to 0:10. Punch-in zoom for emphasis
- 0:10 to 0:13. Pattern interrupt, sound effect or title card
- 0:13 to 0:18. Explanation section
- 0:18 to 0:22. CTA or payoff
This becomes your skeleton.
3. Rebuild that skeleton as a blank edit
Open your editor and create a clean project with:
- text layers already styled
- caption safe zones marked
- placeholder clips for B-roll slots
- zoom keyframes or notes where emphasis usually happens
- sound effect markers
- an ending card or CTA slot
Name it something obvious like “Talking Head Fast Tips v1” or “Storytime Proof Template.”
Now every future edit starts with structure.
What should stay fixed, and what should stay flexible
This is where people get tripped up.
If your template is too rigid, your content starts feeling stale. If it is too loose, you are back to making every decision from scratch.
Keep these fixed
- caption style and position
- your usual font pair
- intro title placement
- default zoom rhythm
- music level presets
- CTA screen layout
Keep these flexible
- the first hook line
- which B-roll you use
- how long each section runs
- whether a joke, pause or visual beat needs more room
- platform-specific tweaks for TikTok, Reels or Shorts
The template should remove boring choices, not creative ones.
The easiest way to make templates if your raw footage is messy
If your main problem is not layout but cutting the spoken content down fast, pair this method with transcript-based editing. That way you tighten the words first, then drop the cleaned-up clips into your blueprint.
A good companion read is The “Transcript Chop” Hack: Edit Reels Like a Google Doc Instead of a Timeline. It is a smart way to reduce the “find the good take” problem before you even start placing B-roll and text.
Three template types most creators should have
1. Talking-head advice template
Best for tips, tutorials, lessons and opinions.
This usually includes:
- big hook text in the first second
- centered or lower-third captions
- quick punch-ins every few seconds
- one or two B-roll slots
- short CTA at the end
2. Proof or case-study template
Best for client wins, before-and-after examples, analytics breakdowns and product demos.
This usually includes:
- a bold result in the first line
- screenshot placeholder frames
- highlight box animations
- step-by-step text cards
- end screen with takeaway
3. Storytime or mistake-to-lesson template
Best for personal brand content.
This usually includes:
- curiosity-driven hook
- slightly slower pacing at the start
- reaction cut or dramatic pause marker
- mid-video pattern interrupt
- lesson summary at the end
How to steal structure from viral videos without copying them badly
There is a right way to do this.
Do not copy someone else’s lines, graphics, or exact scene sequence. Copy the editing logic.
Ask these questions:
- How fast does the first text appear?
- How long before the first visual change?
- When does the punch-in happen?
- How often do they switch between face and B-roll?
- Where does the payoff land?
You are looking for timing patterns. Not identity theft.
Use markers like road signs
One of the simplest upgrades is adding timeline markers with labels.
Examples:
- HOOK
- OPEN LOOP
- B-ROLL 1
- ZOOM
- PROOF SHOT
- CTA
These tiny labels save more time than people expect. You stop staring at the timeline wondering what comes next.
How to batch three to ten clips in one sitting
Here is a practical workflow.
Step 1. Write multiple hooks first
Do not fully edit clip one before thinking about clip two. Write five to ten hooks in one session.
Step 2. Record all talking-head footage together
Same lighting. Same mic. Same energy block.
Step 3. Trim the spoken parts
Use transcript editing if your editor supports it, or do rough cuts first.
Step 4. Drop each trimmed clip into the right template
This is where the blueprint pays off. Captions, text zones, B-roll slots and CTA placement are already waiting.
Step 5. Swap custom elements
Change the hook text, add the right cutaways, and tweak pacing where needed.
Step 6. Export in batches
Create platform versions only if they need specific changes. Otherwise keep one master vertical file.
Common mistakes that make templates fail
Making them too fancy
If your template has ten animations, six fonts and endless keyframes, it will become another chore. Keep it light.
Using only one template for every idea
Not every message wants the same rhythm. Have a small set of templates, not just one.
Forgetting safe zones
TikTok, Reels and Shorts all love covering parts of your frame with interface elements. Build your captions and text where they will not get blocked.
Never updating the blueprint
Templates should evolve. If a new hook style works better, update the master. If your pacing feels old, refresh it.
What software works best for this?
You do not need a fancy setup.
This works in CapCut, Premiere Pro, Final Cut, DaVinci Resolve and most mobile editors that support duplicate projects or saved presets. The key feature is not the brand name. It is the ability to save styled text, duplicate timelines and reuse your edit structure.
If your app lets you duplicate a finished project and replace media, you can do this.
At a Glance: Comparison
| Feature/Aspect | Details | Verdict |
|---|---|---|
| Blank timeline editing | You decide captions, cuts, zooms and B-roll placement from scratch every time. | Flexible, but slow and mentally tiring. |
| Template-to-timeline workflow | A saved project already includes text styles, pacing markers, B-roll slots and CTA placement. | Best for speed, consistency and batch production. |
| Overbuilt template system | Too many effects, rigid timing, and no room to change hooks or pacing. | Can save time at first, but often makes content feel stale. |
Conclusion
You do not need to become a machine. You just need to stop spending your best creative energy on repeat decisions. Short-form is moving so fast in 2026 that the real advantage is not one more AI app, it is how quickly you can go from script to export without quality dropping. A repeatable template-to-timeline system lets creators who have a day job or client work batch three to ten clips in a sitting, keep their style consistent across TikTok, Reels and Shorts and swap in new hooks instead of reinventing the entire edit every time. That means less burnout, more volume and more testing, which is exactly what creators need in a feed where everyone else is already using the same AI tools.