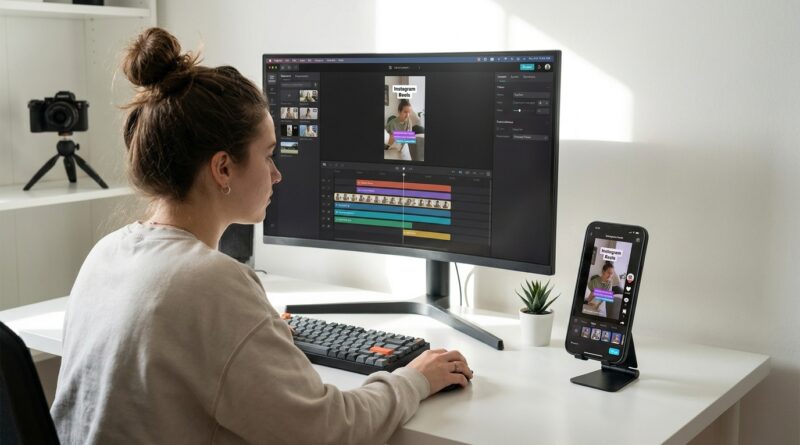
The “CapCut Desk-First” Hack: Build Pro Reels On Desktop, Then Finish On Your Phone In 5 Minutes
If you have ever tried to build a full Reel in CapCut on your phone, you already know the pain. The app freezes at the worst moment. Drafts disappear. Tiny timeline handles make basic cuts feel like surgery with oven mitts on. Then you look at Premiere Pro or DaVinci Resolve for a 30 second clip and think, no thanks. That is the gap a lot of creators are stuck in right now. The good news is you do not need to choose one extreme or the other. A simple capcut desktop and mobile workflow for reels gives you the best parts of both. Do the heavy lifting at your desk, where trimming, layering, and caption cleanup are much faster. Then move to your phone for the last five minutes, where platform-native sounds, stickers, filters, and posting tools still work best. It is faster, safer, and much less likely to end with a vanished draft.
⚡ In a Hurry? Key Takeaways
- Build the main edit in CapCut Desktop, then finish the final polish and posting steps on your phone.
- Export a clean vertical draft from desktop, send it to your phone, and only add platform-specific sounds, filters, and final text there.
- This cuts editing time and lowers the risk of losing work to mobile draft glitches or app slowdowns.
Why this hack works so well
Phone editing is great for quick tweaks. It is not great for long sessions, layered timelines, or lots of precise cuts. That is where frustration kicks in.
Desktop CapCut is simply easier for the boring but important parts. You can see more of the timeline. You can drag clips where you want them without zooming in and out every ten seconds. You can clean up captions faster. And your hands are using a mouse and keyboard instead of two thumbs on glass.
Then, when the structure is done, the mobile app still has one big advantage. It feels closer to the platforms you are posting to. It is often easier to test looks, add a trending sound, adjust text placement for Instagram or TikTok, and publish from the device where your social apps already live.
The desk-first, phone-finish workflow
Step 1: Start with a vertical project on desktop
Open CapCut Desktop and set your project to 9:16 before you do anything else. That keeps your framing honest from the start. If you cut in a wide frame and try to squeeze it later, you usually end up redoing half the work.
Import everything at once. Your talking head clips, B-roll, screenshots, music beds, and any logos or brand elements. This is where desktop wins. You can organize the mess fast.
Step 2: Do all the heavy editing at your desk
This is the part you want off your phone.
Trim your clips. Remove pauses. Rearrange scenes. Add B-roll on upper tracks. Resize and reframe shots. If you are using auto captions, generate them here, not on mobile. It is much easier to correct names, punctuation, and weird word choices with a keyboard.
If your footage also needs stabilizing or noise cleanup, do that before the phone step. A good companion move is The ‘One-Pass Clean-Up’ Hack: Fix Shaky, Noisy Reels With A Single AI Enhancement Layer. It fits nicely here because you can fix the ugly stuff once, then move on.
Step 3: Keep the design simple on desktop
This is where many creators accidentally waste time. They build a near-final graphic package on desktop, then redo half of it on mobile because Instagram or TikTok changes how it looks.
Instead, keep the desktop version clean. Use safe margins. Add your core captions. Use basic text if needed. Do not get too precious about final stickers, trendy fonts, or app-native effects yet.
Think of the desktop edit as your locked cut. The story should be done. The pacing should be done. The visuals should be 90 to 95 percent done.
Step 4: Export a high-quality draft
Export in 1080×1920. Keep the bitrate high enough that text stays crisp. Give the file a clear name like reel-final-v3-phonefinish.mp4 so you do not send the wrong version to yourself later.
This is also the moment to save a backup copy in a normal folder outside CapCut. If the app decides to get weird, your actual video still exists.
Step 5: Move it to your phone the easy way
Use AirDrop, Google Drive, iCloud Drive, Dropbox, or a USB cable. Pick the method you already trust. The goal is speed and reliability, not showing off.
If you use cloud storage, wait until the file is fully synced before opening it on your phone. Half-uploaded files are a classic source of confusion.
Step 6: Finish the last five minutes on mobile
Now open the exported video in CapCut Mobile, or import it straight into Instagram Reels or TikTok if you prefer.
This is the phone-only finishing layer:
- Add platform-native sounds or trending audio
- Test mobile-only filters or beauty adjustments lightly
- Check text placement against on-screen buttons and captions
- Add stickers, location tags, or app-native text styles
- Preview how it feels in the actual posting environment
Because the hard edit is already done, this part stays quick. You are polishing, not rebuilding.
What not to do
Do not round-trip the whole project back and forth
A lot of people hear this idea and think, great, I will edit on desktop, tweak on phone, then go back to desktop for another pass. That usually creates file confusion and duplicate versions.
Use a one-way flow when possible. Desktop first. Phone last.
Do not rely on mobile drafts as your only copy
This is the mistake behind most horror stories. If your only version lives inside an app draft, you do not really own a stable copy of the project.
Always keep the exported master file somewhere outside the app.
Do not over-edit for every platform
You do not need three totally separate edits for Reels, Shorts, and TikTok in most cases. Build one strong vertical master. Then do tiny phone-level adjustments for each platform if needed.
Why this is better than jumping to Premiere or DaVinci
Those tools are excellent. They are also often too much for a quick social clip.
If you already know CapCut, staying in its ecosystem makes sense. You skip the learning curve, keep your speed, and still get a cleaner editing experience than doing everything on a phone. For many creators, that is the sweet spot.
This is not about using the fanciest software. It is about removing the friction that stops you from posting consistently.
A practical setup you can copy this afternoon
If you want a simple repeatable routine, use this:
- Record your clips on your phone.
- Send them to your computer.
- Edit the full structure in CapCut Desktop.
- Generate and clean up captions on desktop.
- Export one clean 1080×1920 master.
- Send that master back to your phone.
- Add platform flavor and post.
That is it. No giant software switch. No rebuilding the same edit twice.
Who this workflow is best for
This works especially well if you:
- Make talking-head Reels with captions
- Cut simple product demos or tutorials
- Need quick B-roll layering and text
- Post often and care more about speed than cinema-level color grading
- Have been burned by disappearing mobile drafts
If you are producing complex sponsored videos with heavy effects, then yes, a full desktop editor may still be worth it. But for everyday social content, this method is often the smarter middle ground.
At a Glance: Comparison
| Feature/Aspect | Details | Verdict |
|---|---|---|
| Editing speed | Desktop is much faster for trimming, arranging clips, layering B-roll, and fixing captions. | Do the main edit on desktop. |
| Platform polish | Mobile is still better for native sounds, quick filter tests, stickers, and final posting checks. | Use phone for the final five minutes. |
| Reliability | Keeping a real exported file outside mobile drafts lowers the risk of lost work. | Always save a backup master. |
Conclusion
What keeps coming up in creator communities right now is simple. People are tired of being stuck between clunky app editing and heavyweight desktop software. CapCut on mobile can still be useful, but building whole projects there has become risky and annoying, especially with glitches, vanished drafts, and more features tucked behind paywalls. The desk-first, phone-finish method fixes that without forcing you to learn a whole new editing system. Use CapCut Desktop for the work that needs space, speed, and control. Use your phone for the final social polish that still feels easiest on mobile. If you copy this process once, you can keep using it every week. That means less wasted time, fewer lost drafts, and more Reels, Shorts, and TikToks that look polished without turning your editing routine into a part-time job.