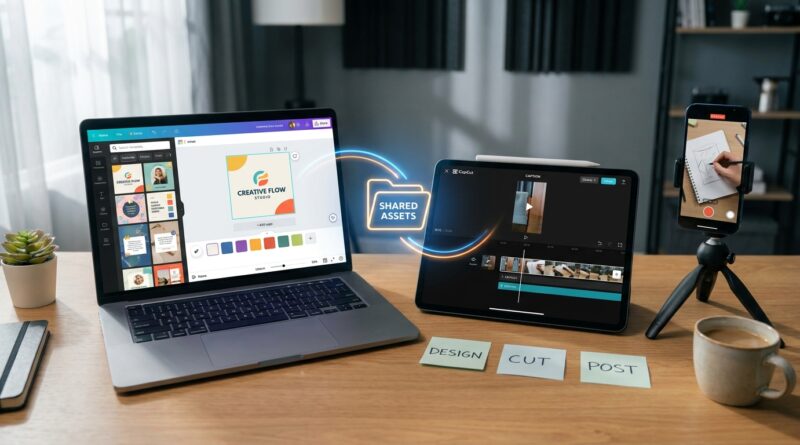
The ‘Two-App Assembly Line’ Hack: Use Canva + CapCut To Edit Faster Than Any All‑In‑One Tool
You are not imagining it. Trying to make one app handle every part of short-form video is a great way to waste an evening and still end up with a Reel that looks almost finished. Canva can feel slow when you need tight cuts, beat-matching, or quick caption timing. CapCut is much faster for actual editing, but once you want neat brand colors, reusable layouts, and polished graphics, it starts to feel a bit thin. That is where the mess begins. Files get exported twice, versions pile up, and suddenly you are hunting for “final-final-v3” in your camera roll. The fix is not picking sides. It is giving each app one clear job. Use Canva as your brand and graphics station. Use CapCut as your cutting and timing station. Treat it like a tiny assembly line, and your whole process gets faster, cleaner, and much less annoying.
⚡ In a Hurry? Key Takeaways
- Use Canva for branding and graphics, then finish the actual edit in CapCut for the fastest results.
- Build one reusable Canva kit and one repeatable CapCut template so each new Short or Reel starts half done.
- Export in stages and keep a simple folder system, or you will lose time to duplicate files and version chaos.
Stop asking which app is better
The better question is which app should do which job.
That is the whole trick behind a smart canva and capcut workflow for social media video editing. Canva is strong at visual consistency. Think title cards, lower thirds, quote slides, product frames, cover images, branded backgrounds, and simple motion elements. CapCut is strong at speed. Think trimming dead air, cutting to the beat, auto captions, zooms, reframing, transitions, and quick effects that fit Shorts and Reels.
When you ask one app to do both jobs, you hit the weak spots of each. When you split the work, both apps suddenly feel better.
The two-app assembly line
Here is the simple version.
Step 1: Start in Canva
Open Canva first, but do not edit your whole video there. Just build the visual pieces you want to reuse.
This can include:
- An intro card that lasts 1 to 2 seconds
- A branded end card with your call to action
- Text slides for hooks, lists, or key points
- Frames for testimonials or screenshots
- A thumbnail or cover image for the post
The goal is not to finish the video. The goal is to prepare the branded ingredients.
Step 2: Export only what you need
Export those Canva pieces as short video clips or PNGs with transparent backgrounds if your plan supports that format. Keep them short and modular. One intro. One end screen. One quote card. One overlay pack.
Do not export a five-minute rough cut from Canva just because you can. That is how you lock yourself into the slower tool.
Step 3: Move to CapCut for the real edit
Bring your phone footage, B-roll, voiceover, and Canva assets into CapCut. Now do the work CapCut is good at.
- Trim pauses
- Cut between takes
- Sync to music
- Add auto captions and fix them
- Use punch-ins, zooms, and motion
- Reorder clips fast
This is where your video starts feeling alive instead of just assembled.
Step 4: Export once, not three times
When the CapCut edit is done, export your final version for the platform you need. Avoid bouncing the full edit back into Canva unless you absolutely need a last-minute layout change. Every extra round trip adds friction and quality loss risk.
What each app should own
Canva’s lane
Give Canva the jobs that benefit from repeatable design.
- Brand fonts and colors
- Reusable title styles
- Quote cards
- End screens
- Logo-safe spacing
- Template-based covers
If you post often, this matters a lot. Brand consistency is hard to fake on the fly.
CapCut’s lane
Give CapCut the jobs that need timing and speed.
- Hook pacing in the first three seconds
- Cleaning up silences
- Captions timed to speech
- Music beats and sound effects
- Cutting around mistakes
- Fast vertical-video effects
This is where an all-in-one setup often slows people down. You are trying to do editing with a design tool, or design with an editing tool.
A plug-and-play workflow you can copy today
If you want a routine you can start using right now, use this:
For talking-head videos
- Write your hook and 3 to 5 key points.
- In Canva, make:
- 1 intro card
- 1 lower-third name tag
- 1 end card
- 1 cover image
- Record your footage on your phone.
- In CapCut, trim aggressively. Remove filler words if needed.
- Add captions in CapCut and clean up the mistakes.
- Drop in your Canva intro at the start and end card at the finish.
- Export in 1080×1920 for Shorts, Reels, or TikTok.
For product demos or tutorials
- Build feature callout cards in Canva.
- Make screen frames or highlighted comparison slides there too.
- Record your demo clips.
- Edit the timing in CapCut so the cuts land exactly when you speak.
- Layer Canva graphics on top where the viewer needs help following along.
That split is the difference between “pretty but stiff” and “fast but messy.”
How to avoid the file-chaos problem
This is the part most people skip, then regret.
Use one folder per video. Inside it, make three subfolders:
- 01 Footage
- 02 Canva Assets
- 03 Final Exports
Name files plainly. Try something like:
- hook-v1.mp4
- end-card-brand-blue.mp4
- captions-fixed-v2.mp4
- final-reel-1080×1920.mp4
If you are working on your phone, this can still be simple. Use albums, cloud folders, or even a single project naming rule. The point is to stop the camera roll from becoming your editing system.
The biggest mistakes people make with this setup
1. Designing too much in Canva
If every sentence becomes a separate Canva slide, your workflow turns into homework. Make only the branded pieces that add clarity or polish.
2. Editing too much in Canva
Basic edits are fine. Precision edits are where it starts dragging. Tight cuts belong in CapCut.
3. Adding branding too late
If you wait until the end to think about fonts, colors, and titles, your content will look patched together. Build your Canva assets first so the style is baked in from the start.
4. Using CapCut effects just because they are there
CapCut makes it very easy to add movement, filters, and flashy transitions. Easy does not always mean helpful. Use just enough to keep attention. Do not turn your video into a slot machine.
How this helps solo creators the most
If you are a one-person team, the usual advice is either too basic or way too advanced. One camp says use one app for everything. The other says learn a full desktop editor. Most people need something in the middle.
This workflow is that middle ground. It gives you cleaner branding than CapCut alone and much faster editing than Canva alone. You get a system without having to become a full-time video editor.
It also scales nicely. Once your Canva brand kit is built and your CapCut editing habits are set, each new video starts from a repeatable process instead of a blank page.
When to break the rule
There are times when using just one app is fine.
- If the video is extremely simple, CapCut alone may be enough.
- If it is mostly animated text slides, Canva alone may be enough.
- If a trend needs a same-day post, speed matters more than polish.
But for regular social posting, especially if you care about looking consistent from post to post, the split workflow wins more often than not.
At a Glance: Comparison
| Feature/Aspect | Details | Verdict |
|---|---|---|
| Branding and templates | Canva is better for reusable intros, end cards, covers, fonts, and color consistency. | Use Canva first. |
| Speed of editing | CapCut is faster for trimming, pacing, captions, music sync, and short-form timing. | Finish in CapCut. |
| Workflow friction | Doing everything in one app creates slower edits or weaker branding. Splitting tasks reduces rework. | Best setup is a clear two-app pipeline. |
Conclusion
You do not need to keep arguing with yourself about whether Canva or CapCut is the better app. For most creators, that is the wrong fight. The smart move is to make them teammates. Let Canva handle the polished, on-brand visual pieces. Let CapCut handle the fast, sharp editing that short-form video demands. Right now a lot of creators are stuck between Canva’s growing video features and CapCut’s short-form speed, and the conversation keeps going in circles instead of solving the real problem. A clear, battle-tested workflow cuts that friction fast. It is especially useful for solo creators who need good design and clean edits without learning a full professional editor. Set up the system once, keep each app in its lane, and tomorrow’s posts can be quicker to make, easier to manage, and a lot more polished.