The ‘Audio-First Polish’ Hack: Fix Your Sound In 5 Minutes And Instantly Boost Watch Time
You can spend an hour fixing color, captions and cuts, then lose people in the first three seconds because your voice sounds like it was recorded in a bathroom. That is the frustrating part. A video can look sharp and still feel cheap. On Reels, Shorts and TikTok, viewers may not know why they swiped away, but bad audio is often the reason. Tinny vocals, room echo, low volume and harsh S sounds quietly hurt watch time.
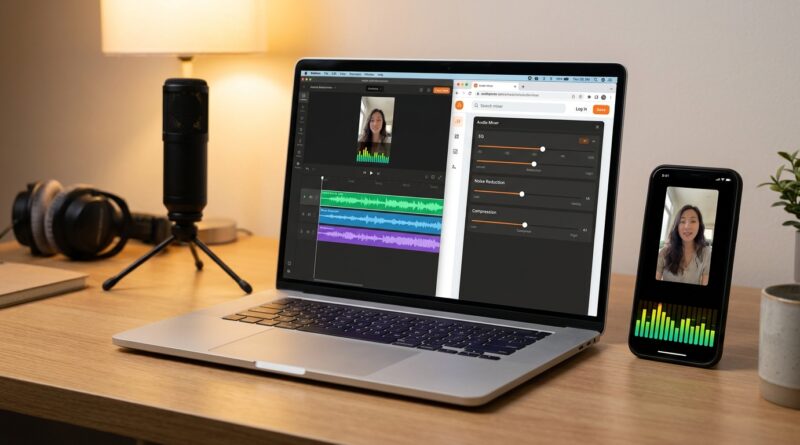
The good news is you do not need to learn full-on audio engineering to fix it. A simple, browser-based polish pass can make your voice sound cleaner, warmer and easier to hear on tiny phone speakers. Think of it as the fastest upgrade you can make to your content. If you want practical audio editing tips for social media videos, start here. Five minutes is often enough to turn “homemade” sound into something that feels far more trustworthy and replay-worthy.
⚡ In a Hurry? Key Takeaways
- Clean audio often improves retention faster than better visuals because viewers notice bad sound almost instantly.
- Use a simple chain in this order: noise reduction, EQ, de-esser, compression, then loudness boost.
- Do not overprocess. If your voice starts sounding robotic, boxy or pumpy, back off and keep it natural.
Why audio is the hidden watch-time killer
Most creators judge a clip with their eyes first. Viewers do not. They judge with their ears almost as fast.
If your sound is thin, echoey or sharp, people feel friction right away. They may not stop and think, “This needs less reverb and better compression.” They just swipe. That is why some average-looking videos keep people watching while prettier edits fall flat.
Right now, visual polish is easier than ever. Templates are everywhere. Auto-captions are built into everything. AI tools can punch up cuts in minutes. So “good enough” visuals no longer stand out much. Clean, warm, easy-to-understand voice audio still does.
The 5-minute audio-first polish hack
This is the fast workflow. You can use it in a browser audio tool, a built-in editor, or almost any software that has basic voice controls. It works whether you edit in CapCut, Premiere, Final Cut or on your phone.
Step 1: Cut background noise first
Start with noise reduction. Remove fan hum, AC rumble, laptop hiss and street noise before you do anything else. If your tool has a “voice isolate,” “noise removal” or “enhance speech” option, use it lightly.
Do not slam it to 100 percent. Too much noise reduction creates that watery, fake sound. A moderate pass is better than a robotic voice.
Step 2: Roll off low rumble with EQ
Use a high-pass filter around 80 Hz to 100 Hz. That trims the stuff most voices do not need, like desk bumps and room rumble.
Then make a small cut in the muddy area, often around 200 Hz to 350 Hz, if your voice sounds boomy or boxed in.
After that, add a tiny boost for clarity around 3 kHz to 5 kHz. Keep it gentle. You are not trying to make your voice harsh. You are trying to help consonants come through on phone speakers.
Step 3: Tame harsh S sounds
This is where a de-esser helps. If your S sounds feel sharp, spitty or tiring, reduce them slightly. Many creators skip this step, and it is one reason their audio feels cheap even when the recording is decent.
If your tool has a de-esser preset, start there. If not, lower some of the bite around 5 kHz to 8 kHz very carefully.
Step 4: Add light compression
Compression makes your voice more even. Quiet words come up a bit. Loud peaks calm down. That matters on social feeds where people listen in noisy places.
You do not need fancy settings. Use light compression. Aim for control, not radio-announcer intensity. If every breath suddenly sounds huge, you went too far.
Step 5: Raise loudness for phone playback
Once the voice is clean and controlled, raise the output so it plays back clearly on small speakers. Many clips fail because they are simply too quiet next to everything else in the feed.
Use your editor’s loudness normalization if available. If not, increase gain carefully and watch for clipping. The goal is present and clear, not distorted.
The copy-paste audio chain to try today
If you want a dead-simple starting point, use this order:
Noise reduction: light to moderate
High-pass filter: 80 Hz to 100 Hz
Mud cut: small dip at 200 Hz to 350 Hz if needed
Presence boost: small lift at 3 kHz to 5 kHz
De-esser: enough to soften sharp S sounds
Compression: light and natural
Limiter or loudness boost: final volume increase without clipping
That chain is the heart of practical audio editing tips for social media videos. It is fast, repeatable and beginner-friendly.
What this fixes in real life
Tinny phone-mic voice
A little EQ and compression can make a thin voice sound fuller and more stable.
Room echo
Noise tools and speech enhancement can reduce some of the “empty room” feel, though severe echo is still hard to remove completely. If echo is bad, moving closer to the mic next time helps more than any plugin.
Low, uneven volume
Compression plus final loudness adjustment makes your speech easier to follow without forcing viewers to turn up the volume.
Harsh consonants
A de-esser is often the difference between “amateur” and “smooth enough to trust.”
How to know if you overdid it
This is the trap. Once creators hear how much better cleaned-up audio sounds, they often keep pushing.
Back off if your voice starts to sound:
- Robotic
- Too bright or piercing
- Pumpy, where volume jumps strangely
- Boxy, like it is trapped in a small can
A good rule is simple. Your voice should sound like you on your best day, not like a fake podcast preset.
Best way to check your results
Do not judge final audio on studio headphones alone. Test it where your audience listens.
Play your clip on:
- Your phone speaker
- Cheap earbuds
- A slightly noisy room
If every word is easy to catch in those conditions, you are close.
Why this matters more now
Feeds are packed with polished-looking clips. A lot of them use the same templates, the same animated captions and the same auto-edit style. Visual sameness is everywhere.
Audio still creates instant trust. When someone hears a clean, warm voice, the whole video feels more credible. It feels more worth their attention. That is a big advantage if you are trying to stand out without spending all day editing.
And if you are already trying to speed up production, pair this with a workflow like The ‘One-Script Batch Edit’ Hack: Turn A Week Of Reels Into Clips In A Single Text Pass. Batch editing saves time on the visual side. This audio-first pass keeps those clips from sounding rushed.
Browser-based tools are enough for most creators
You do not need to buy expensive software just to fix speech. Many browser tools now offer speech cleanup, basic EQ and loudness controls that are more than enough for short-form content.
The point is not to become an audio specialist. The point is to remove the one thing quietly hurting retention.
That is why these audio editing tips for social media videos work so well. They are built for speed. You can record anywhere, clean it up quickly, and publish without turning your workflow into a full production studio.
At a Glance: Comparison
| Feature/Aspect | Details | Verdict |
|---|---|---|
| Visual polish vs audio polish | Fancy cuts and color help, but weak voice audio causes faster drop-off in many short-form videos. | Fix audio first |
| Full audio software vs browser tools | Pro tools offer deeper control, but browser editors are faster and easier for most creators making social clips. | Browser tools are usually enough |
| Heavy processing vs light cleanup | Too much noise reduction or compression can make speech sound fake and tiring. | Keep it natural |
Conclusion
You do not need perfect gear or complicated software to sound better fast. Right now feeds are flooded with AI-edited clips, templates and auto-caption tools, so “good enough” visuals are no longer a differentiator. What still stands out immediately is clean, warm, podcast-quality sound that plays well on tiny phone speakers. A fast, browser-based audio polish workflow lets busy creators fix their biggest hidden retention killer without learning complex audio software, and it works no matter what you edit on, CapCut, Premiere, Final Cut or your phone. If you copy this audio chain and use it consistently, you give every clip a better shot at higher retention, more replays and more trust. Five minutes of sound cleanup can do more than another hour of transitions.