The ‘One-Hour Multi-Format Batch’ Hack: Turn Every Edit Into Reels, Shorts And TikToks At Once
You get a reel looking perfect on your phone, post it, and then the pain starts. Instagram trims your captions. YouTube adds awkward padding. TikTok decides your opening text sits too low and suddenly your best hook is half-hidden by buttons. So you export again. Then again. Then one more time “just to be safe.” It is a miserable little time sink, and almost every creator falls into it.
The fix is not making three separate edits from scratch. It is building one master vertical edit, then batching platform-safe versions from that same timeline in about an hour. If you set up safe zones, keep your subject framed for all three apps, and use auto-resize only as a helper instead of trusting it blindly, you can batch edit reels shorts tiktok in one workflow without losing your mind. The goal here is simple. One clean edit. Three exports. No fiddly last-minute repairs unless a platform preview shows something truly broken.
⚡ In a Hurry? Key Takeaways
- Build one 9:16 master edit first, then export platform-specific versions from copies of that timeline.
- Keep text inside a central safe zone and check top and bottom UI areas before exporting.
- Auto-resize tools save time, but always preview each version on-platform because app overlays can still hide key captions and hooks.
The core idea of the one-hour batch
Think like a director, not a button-pusher. You are not making three videos. You are making one strong vertical video with enough breathing room to survive three different apps.
All three platforms like 9:16 vertical. That part is easy. The annoying part is that each one places interface buttons, captions, usernames, and feed previews in slightly different places. That is why a clip that looks great in your editor can feel cramped or messy once it is live.
Your job is to create a master edit that protects the important stuff. Face. Hands. Product. On-screen text. Hook. Subtitles. If those all live in safe areas, the same edit can travel well.
What to set up before you touch the timeline
1. Pick a master canvas
Start with 1080 by 1920. Standard 9:16. Use that as your master project size even if your source footage came from a phone, camera, Zoom call, or screen recording.
2. Create your own safe zones
This is the part most people skip, then regret later.
Add simple guides to your editor so you avoid placing key text too close to the top or bottom. A practical rule is this:
- Keep main hook text in the middle upper area, not touching the top edge.
- Keep subtitles above the bottom UI clutter.
- Keep faces and products centered, with a little extra headroom.
You do not need perfect math. You need consistency. If your editor supports guides, use them. If not, drop in a temporary overlay PNG with marked safe zones.
3. Decide what is truly platform-specific
Usually only three things need changing per app:
- Caption placement
- Top hook text size or line breaks
- End screen spacing
Everything else should stay the same unless the preview says otherwise.
The actual one-hour workflow
Step 1. Build the master edit once
Do your real editing here. Tight cuts. Clean pacing. Good subtitles. Strong opening line in the first two seconds. If the clip drags, no export trick will save it.
Keep the subject slightly larger than you think you need, but not so large that any auto-reframe tool starts cropping foreheads or hands. Leave a bit of margin around the action.
Step 2. Add universal captions, then simplify them
Most creators overload captions. Tiny text. Too many words. Fancy highlights everywhere. Looks cool in the editor. Looks awful when an app stacks interface elements on top.
Use short caption lines. Two lines max where possible. High contrast. Large enough to read on a phone at arm’s length. Place them above the lower third danger zone.
If you are clipping longer videos into shorts, this exact principle pairs well with The ‘Auto-Clip Pipeline’ Hack: Turn One Long Video Into A Week Of Reels In An Hour. That piece is about finding the clips fast. This one is about making those clips survive every platform.
Step 3. Duplicate the timeline three times
Now make copies labeled clearly:
- Master
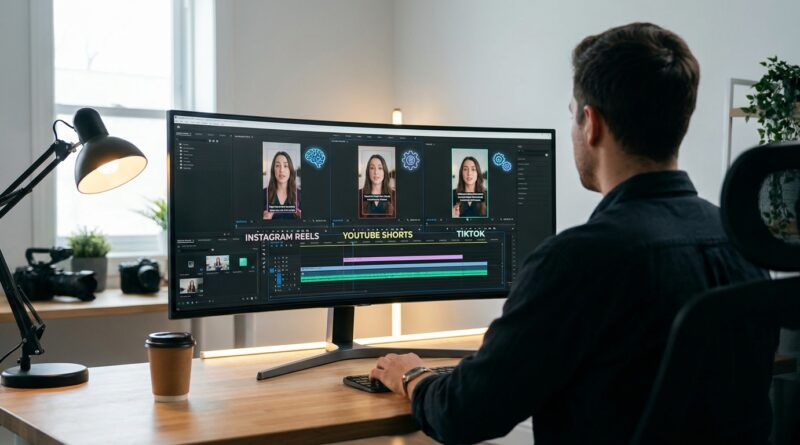
- IG Reels
- YouTube Shorts
- TikTok
This is where the mental load drops. You are no longer “re-editing.” You are making light finishing adjustments.
Step 4. Use auto-resize as a first pass, not the final answer
If your tool has auto-reframe, auto-crop, or smart resize, turn it on for each duplicate. Let it do the boring work. Then watch the full 30 seconds and fix the obvious misses.
Check for:
- Face drifting off-center
- Text colliding with app UI
- Fast cuts where the subject jumps position
- Products or gestures getting clipped
Auto tools are good now. They are not magic. They tend to struggle most with two-person shots, fast movement, and screen recordings.
Step 5. Make tiny platform tweaks
This should take minutes, not half your night.
For Instagram Reels: Watch your lower caption area and any text near edges. Reels can feel tighter in feed than in your editor preview.
For YouTube Shorts: Check for black bars or odd scaling if your source clips came from mixed formats. Also make sure your opening text is readable in the Shorts shelf preview.
For TikTok: Be extra careful with hook text placement and any bottom subtitles. TikTok’s UI clutter can cover more than people expect.
A simple framing rule that saves a lot of pain
Keep the most important thing in the center 60 to 70 percent of the frame.
That sounds basic because it is. But it works. When creators get burned by cross-platform posting, it is usually because they designed for the full frame while the apps display something closer to a “usable middle.”
If your subject lives in that middle area, and your text avoids the top and bottom danger zones, your exports will hold up much better.
How to handle different source footage
Talking head videos
These are easiest. Center the speaker. Keep captions mid-low, but not too low. Put hook text in the upper middle. Done.
Podcast clips with two people
Do not zoom in too aggressively. If one speaker gets cropped every time the camera shifts, your “smart” edit stops feeling smart. Sometimes a slightly wider crop keeps both people readable across all three platforms.
Screen recordings and tutorials
This is where many edits fall apart. Tiny interface details become unreadable when shoved into vertical. You may need to punch in on the action and move callout text higher than usual. If the screen is the star, do not let subtitles cover the exact button or menu you are explaining.
File naming matters more than you think
Use dull, boring, obvious names. Seriously.
- clip-name_master_v1
- clip-name_reels_v1
- clip-name_shorts_v1
- clip-name_tiktok_v1
That stops you from uploading the wrong version at 11:48 p.m. and discovering the mistake the next morning.
Your copy-paste checklist for tonight
Here is the practical version.
- Create one 1080×1920 master project.
- Add safe zone guides.
- Edit the video once for pacing and story.
- Add large, simple captions inside the safe zone.
- Duplicate the timeline three times.
- Run auto-resize or auto-reframe on each copy if available.
- Adjust framing and text placement for Reels, Shorts, and TikTok.
- Export all three in one batch.
- Preview each file on your phone before posting.
- Only then upload.
If you do this regularly, save the project as a template. Next time, half the setup is already done.
Common mistakes that quietly hurt retention
Captions too low
If viewers cannot read the first line of your subtitles because an app button sits on top of it, they leave fast.
Hook text too long
Your opening line should be punchy. If it wraps into four lines, it feels like homework.
Over-trusting the preview inside your editor
Your editor is not the final app environment. Always check on a phone.
Reframing every shot differently
Too much motion from crop changes makes the video feel twitchy. Keep it steady unless the movement helps the story.
Why this matters more right now
Every platform is pushing vertical video harder, and the tools for making it are getting smarter every week. That is good news, but it also means creators can drown in options. New AI resizers and editors show up constantly. Most promise one-click perfection. Most still need a human eye.
The real edge is not having the fanciest app. It is having a repeatable system. When you can batch edit reels shorts tiktok in one workflow, you stop wasting energy on soul-destroying micro-exports and start spending it where it counts, on better hooks, sharper ideas, and more tests.
At a Glance: Comparison
| Feature/Aspect | Details | Verdict |
|---|---|---|
| Master edit approach | One 9:16 timeline with safe zones, then duplicate for each platform | Best balance of speed and control |
| Auto-resize tools | Useful for first-pass framing, but can miss faces, captions, and screen details | Use them, then manually check |
| Safe zone planning | Protects hook text, subtitles, and subject from app overlays and awkward crops | Most important step for consistent results |
Conclusion
You do not need to become a motion designer to look polished across Instagram, YouTube, and TikTok. You just need a workflow that respects how each platform treats the same vertical frame a little differently. Build one strong master edit. Protect your safe zones. Let smart auto-resize help, but do not hand it the keys. Then export in batches and move on with your life. That means less time doing fiddly versioning work and more time testing ideas that might actually grow your audience. For smaller creators especially, this kind of consistency makes your content feel intentional, not accidental. And with new editing and resizing tools popping up almost daily, having a clear, repeatable process you can run tonight is the sort of behind-the-scenes discipline that keeps people coming back.